jekyll与docker初体验

从安装换源到宿主机站点目录拷贝到web服务器容器。

下载安装以及换源

额外的配置镜像源

  • https://docker.mirrors.ustc.edu.cn
  • https://registry.docker-cn.com
1
2
3
4
5
{
  "experimental": true,
  "debug": true,
 "registry-mirrors": ["http://hub-mirror.c.163.com"]
}

实验🧪

在本身项目相关教程模糊或是配置繁琐,我们始终在搜寻适合我们的教程,又被这些繁琐的教程带了节奏,偏偏各种报错,连自己都不知道自己在配置什么了…一开始在急于求成完成项目的心境下还是真的太累了…

而且他们都是根据自己特例所进行的繁杂操作,不具有普众性。

因此,我们要极其清楚自己的目的:

  • 文档在表达了哪些过程?过程是否存在模糊?
  • 冗余淀长的配置是否合理?在对比同类型文章的情况下
  • 在大方向上,自己要分几步走?
sequenceDiagram
dockerfile->image:build
image->container:run
container->image:commit

开始 »>

安装及使用ubuntu镜像

1
2
3
4
docker pull ubuntu
# https://www.cnblogs.com/jzxy/articles/12106133.html
# -i: 以交互模式运行容器;-t: 为容器重新分配一个伪输入终端,通常与 -i 同时使用
docker run -it ubuntu /bin/bash

安装完成之后,我们退出重新看一遍发现:⚠️每次运行一次镜像都会生成新的初始环境的容器

情景1,临时测试删除容器docker run -it --rm ubuntu

情景2,由上发现此现象,所以我们需要指定容器运行。☑️

1
2
3
4
5
docker ps --help # 容器状态选项帮助
docker ps -a # 查看所有容器
docker exec -it d51808071b61 /bin/bash # 根据id执行相应容器,name也可以使用
apt-get update # apt-get不能下载?,更新apt-get
apt-get install -y ruby && apt-get install -y jekyll

至此Jekyll环境安装完成✅

可能刚好会遇见

不同平台的Jekyll产品安装方式以及迁移问题,还有一系列的相关警告

不同平台的安装的注意项

重装Jekyll for Ubuntu

gem与apt-get的区别,直白来说:如果管理或安装相应的ruby组件就用gem,经测试apt-get来安装jekyll存在一定的功能缺陷即使用异常,组件安装不全。所以在安装完ruby后使用gem进行安装Jekyll。

1
2
3
4
5
6
7
8
9
10
11
12
apt-get update
# 你的网络环境可能需要执行以下安装命令两次,
# 直至使用jekyll -v能够显示版本
apt-get install ruby ruby-dev make gcc nodejs
apt-get install ruby-full build-essential zlib1g-dev

echo '# Install Ruby Gems to ~/gems' >> ~/.bashrc
echo 'export GEM_HOME="$HOME/gems"' >> ~/.bashrc
echo 'export PATH="$HOME/gems/bin:$PATH"' >> ~/.bashrc
source ~/.bashrc

gem install jekyll bundler

将文件复制到其他平台上的问题

直接用docker cp复制博客目录到容器里,报错信息如下所示,看起来不对劲。

1
2
3
4
5
6
7
8
9
10
11
12
13
14
15
16
17
18
19
 
[!] There was an error parsing `Gemfile`:
[!] There was an error while loading `jekyll-theme-chirpy.gemspec`: No such file or directory - git. Bundler cannot continue.

 #  from /jekyll-theme-chirpy/jekyll-theme-chirpy.gemspec:13
 #  -------------------------------------------
 #
 >    spec.files         = `git ls-files -z`.split("\x0").select { |f|
 #      f.match(%r!^((assets\/(css|img|js\/[a-z])|_(includes|layouts|sass|config|data|tabs|plugins))|README|LICENSE|index|feed|app|sw|404|robots)!i)
 #  -------------------------------------------
. Bundler cannot continue.

 #  from /jekyll-theme-chirpy/Gemfile:5
 #  -------------------------------------------
 #
 >  gemspec
 #
 #  -------------------------------------------
 

删除了Gemfile,bundle init && bundle install效果也是不理想,“ the theme could not be found. (Jekyll::Errors::MissingDependencyException)”,于是在StackOverflow上找到解决方案。

stackoverflow-Jekyll theme could not be found

So, in short, simply follow the steps below:

  • Add the theme-gem to your Gemfile
  • add the theme to your _config.yml (correctly done already..)
  • Run: bundle install (just to make sure Bundler is able to use it)
  • Run: bundle exec jekyll serve

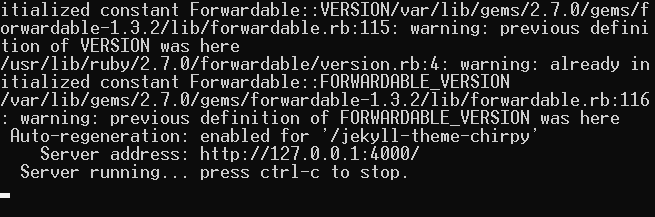
这也是后来才知道,我的主题是git clone的,使用_config.yml生效,Gemfile却没有添加相关主题;警告方面,看了下 warning: already initialized constant APP_PATH #40518的讨论,如下图警告其实也算正常的。

1
2
3
4
Warning: the running version of Bundler (2.1.2) is older than the version that created the lockfile (2.2.16). We suggest you to upgrade to the version that created the lockfile by running `gem install bundler:2.2.16`.
The dependency tzinfo (~> 1.2) will be unused by any of the platforms Bundler is installing for. Bundler is installing for ruby, x86_64-linux but the dependency is only for x86-mingw32, x64-mingw32, x86-mswin32, java. To add those platforms to the bundle, run `bundle lock --add-platform x86-mingw32 x64-mingw32 x86-mswin32 java`.
The dependency tzinfo-data (>= 0) will be unused by any of the platforms Bundler is installing for. Bundler is installing for ruby, x86_64-linux but the dependency is only for x86-mingw32, x64-mingw32, x86-mswin32, java. To add those platforms to the bundle, run `bundle lock --add-platform x86-mingw32 x64-mingw32 x86-mswin32 java`.
The dependency wdm (~> 0.1.1) will be unused by any of the platforms Bundler is installing for. Bundler is installing for ruby, x86_64-linux but the dependency is only for x86-mingw32, x64-mingw32, x86-mswin32. To add those platforms to the bundle, run `bundle lock --add-platform x86-mingw32 x64-mingw32 x86-mswin32`.

其实到整理已经可以正常使用Jekyll及主题了。

image-20210410151232542.png

宿主机访问问题

一开始看些入门教程我还不知道容器还有其相关的网络模式,看了脚本之家-Docker 网络模式(四种)详细介绍docker run -it --net=host,宿主机上输入localhost:4000,在测试之后还是不行…

最后,看来还是得上apache,将_site挂载到apache上部署访问,https://hub.docker.com/ 可在此官网搜寻apache docker镜像下载。虽然这么做成本高,却也是了解docker及web服务器使用很好的用例。

通过docker中 运行httpd文章的流程,这里以Windows为例:

1
2
3
4
5
6
# 创建并运行容器 httpd-test,而且将容器开放8000端口映射在主机80上
docker container run -p 8000:80 --name httpd-test httpd
# 以命令行交互式进入容器终端
docker exec -ti httpd-test /bin/bash
拷贝目录到httpd容器站点存放目录
docker cp c:\jekyllblog\_site\. a29403526515:/usr/local/apache2/htdocs

⚠️有关于“docker cp requires exactly 2 arguments”多半是字符写错了。另外,运行web服务器,也发现新的过程原由:为什么jekyll为要在 _config.yml 的permalink项追加.html的原因。

Docker 安装 Apache中挂载方式过于麻烦,面对我们静态博客这种小型项目实在过于麻烦,还不如docker cp简单🤣。